Installation
Add OpenUI Chat to an existing Next.js App Router application.
This page covers package installation, style imports, and a basic render check for an existing Next.js App Router app.
Starting a new project? Skip this guide and use our scaffold command instead: npx @openuidev/cli@latest create --name my-app
Prerequisites
This guide assumes:
- Next.js App Router
- React 18 or newer
- a page where you can mount a chat layout
1. Install dependencies
Install the UI package, the headless core, and the icons package used by the built-in layouts.
bash npm install @openuidev/react-ui @openuidev/react-headless lucide-react
bash pnpm add @openuidev/react-ui @openuidev/react-headless lucide-react
bash yarn add @openuidev/react-ui @openuidev/react-headless lucide-react
bash bun add @openuidev/react-ui @openuidev/react-headless lucide-react
2. Import the styles
Import the component and theme styles in your root layout.
import "@openuidev/react-ui/components.css";
import "@openuidev/react-ui/styles/index.css";
import "./globals.css";

export default function RootLayout({ children }: { children: React.ReactNode }) {
  return (
    <html lang="en">
      <body>{children}</body>
    </html>
  );
}
These imports give you the default chat layout styling and theme tokens.
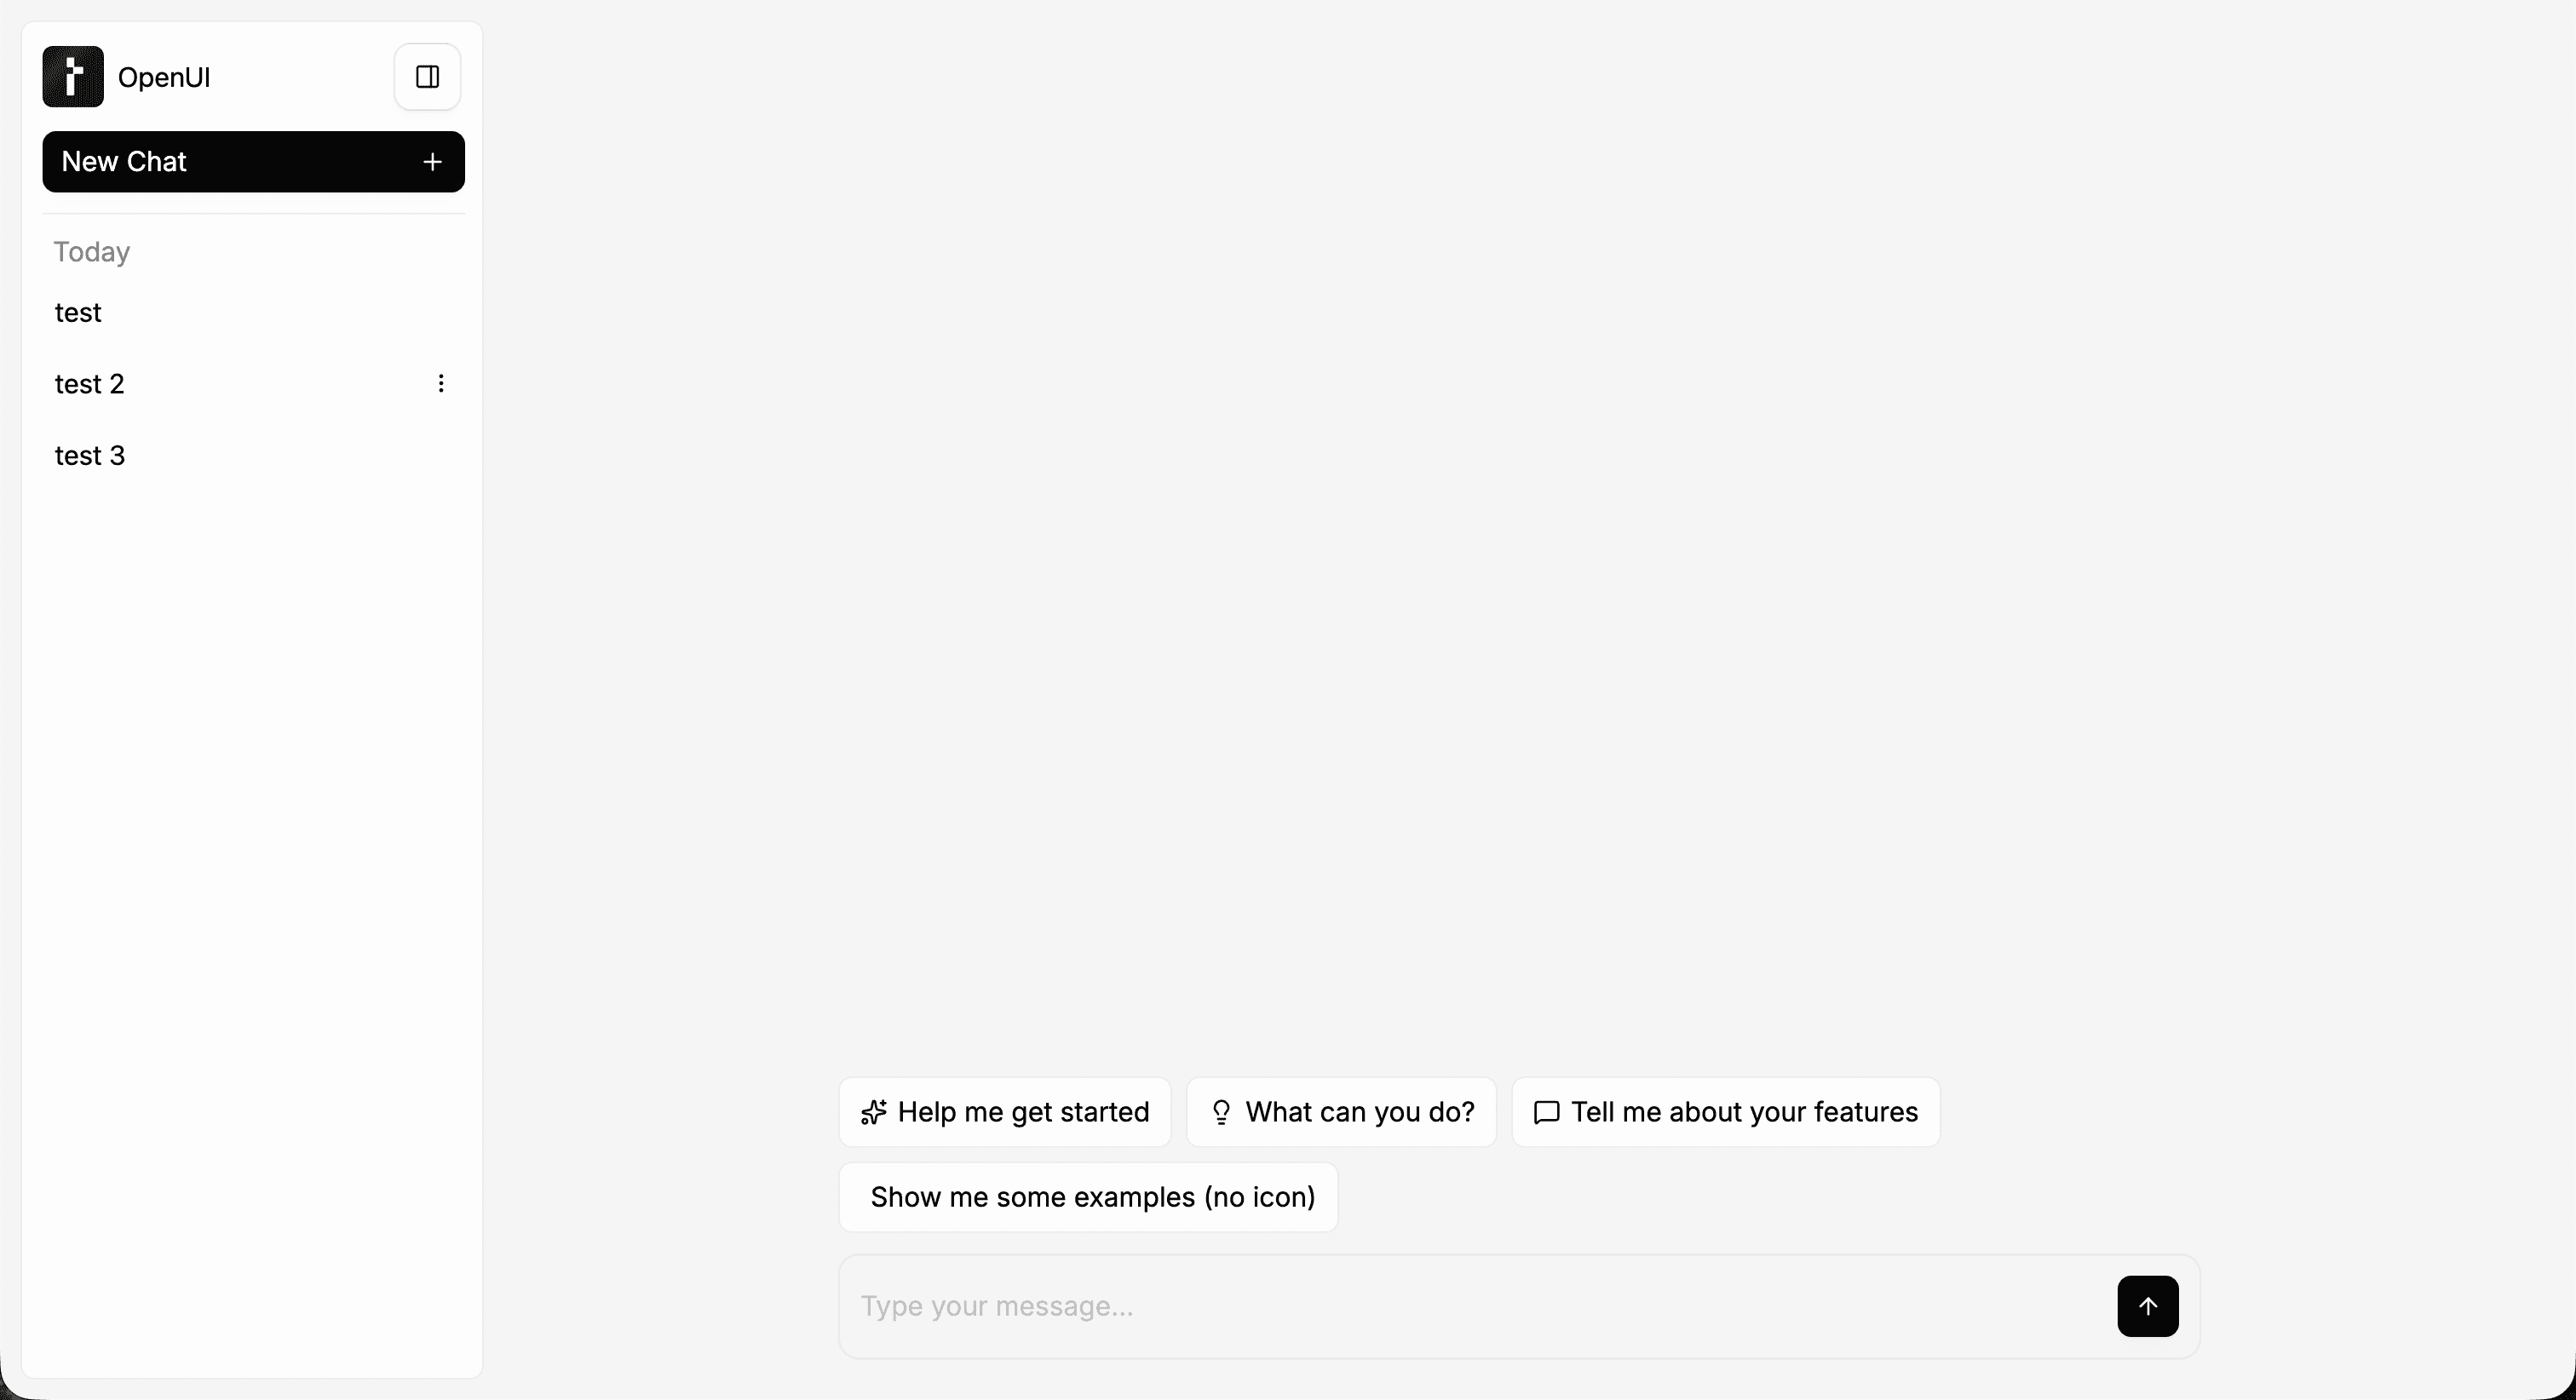
3. Render a layout to verify setup
Render one of the built-in layouts on a page to confirm the package is installed correctly.
// app/page.tsx
import { FullScreen } from "@openuidev/react-ui";

export default function Page() {
  return (
    <div className="h-screen">
      <FullScreen apiUrl="/api/chat" agentName="Assistant" />
    </div>
  );
}
At this stage, the page should render the layout shell. It will not send working chat requests until you add a backend.